I used some baskets to elevate the wings so that that winglet tips did not touch the ground. I then used ratchet straps to make sure the wings did not fall off the stands in case they were bumped into...
I should note that I am not planning on installing the bottom winglets. I've spoken to many Long-EZ owners who have made this mod and are very happy with the results. This causes a few headaches in the winglet installation process - mainly because without the bottom winglets, there is almost no room for the hidden rudder belhorns. So I had to come up with a strategy and I will try my best to explain it as I go...

In order to allow room for the hidden rudder belhorn, I needed to create a "pocket" just above the bottom of the winglet. This is where the hidden rudder belhorn will "hide". However, I can't create this pocket with the rudder in the way. So I decided to cut my rudders out first. Here is Liam helping me make sure the rudder hinge line was marked correctly following the "High performance rudder" plans.
After both the inboard and outboard hinge lines were cut, we used a hacksaw blade to slice through the foam - using the cut fiberglass hinge lines as a channel guide...
Booom! Rudders cut out from the winglets!
And of course, repeated for the left winglet / rudder.
I then cut the rudder conduit a bit inboard of the wing's edge. This is to allow room for the rudder cable to move forward and aft as indicated in the "internal rudder belhorn" plans.
I drew a line about 1" above the bottom of the winglet to serve as a guide as to how deep the belhorn pocket needed to be.
Also drew it on the inboard side...
Using the dremel, I removed the foam to create the belhorn pocket...
Since the pocket will be glassed, it was important to prep the pocket walls for a good glass-to-glass bond... using the dremel to remove all micro down to the bare glass...
Here I am trying to show how the hidden rudder belhorn will work. I didn't have the actual belhorns with me at the time I took these pics, so please excuse the mock-up cardboard belhorns... This will be the belhorn in the neutral position.
When the rudder cable is pulled, the belhorn will pivot about the hinge line, and deploy the rudder outboard.
It will sit just above the bottom of the winglet inside the pocket (keep in mind the wing is upside down here)...
Here it is again "deployed"...
With the belhorn pockets complete, it was time to prep for the inside layups... this meant making sure the edge where the winglet meets the wing was sanded round, making sure all surfaces were sanded and all micro removed, all flox corners properly prepped, com antenna cable tucked, etc...
And repeat on the other side..
I should note that the plans say to make the "A" block now and install it before the inside layup cures; however, I don't see how one is supposed to make an "A" block to conform into that pocket without messing up the layup. So I decided to install foam block "A" AFTER the inside layups cure.
I started out by pre-pregging the 8 plies of BID at 45 degree on the bench and cutting the slot for the wing's shear web...

I then painted the inside pockets with plain epoxy... and slide the pre-preg in.. this was a LOT easier than I had thought.. 8 plies of BID is pretty easy to handle and doesn't bunch up as I had expected it to. Notice all the foam wedges ready to go...
Used a ziplock bag as a baker puts icing on a cake to apply flox inside of the inboard corner pockets...
Then inserted the foam wedges and let the flox ooze out!
As we were inserting the wedges, we used a spatula to trim the wedges flush..
Some required a razor blade to fine trim the wedges... being extremely careful to not touch the 8 plies of BID underneath...
Hard to see in the pic, but the corner of the prepreg was not covered by any foam wedges... so that the next layup (layup #2) could bond along this edge...
Applied flox to all remaining corners and slurried the foam surfaces...
We then prepregged 6 of the 8 plies that is layup #2. Notice how this prepreg starts just forward of the rudder conduit. The last 2 plies of BID go all the way back to glass the belhorn pocket. Keep in mind, this is done before layup #1 cures, so that the corner edge of layup #1 and #2 bond together.
With the 6 ply prepreg installed, we then applied the remaining 2 plies (on location.. not prepregged)
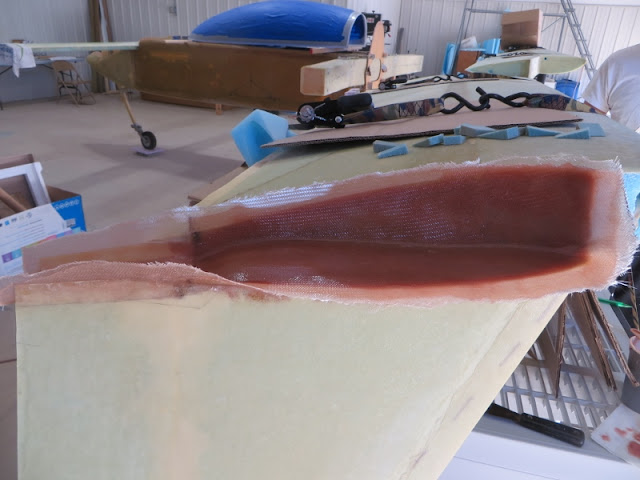
Inside layup complete!
After cure, I trimmed all the edges perfectly flush!
Same process was done on the right (starboard) winglet...
Notice the small hole about 1.5" forward of the wing's trailing edge.. that is where the rudder conduit dead-ends into the belhorn pocket...
And there you have it!! Winglet inside layups complete!!


No comments:
Post a Comment